TL;DR: Learn how to create professional marketing visuals by combining multiple AI-generated images. This tutorial guides you step by step: creating accessories, backgrounds, virtual models, image extension, and final composition with text for social media.
In the world of digital marketing, quality visuals are essential to capture your audience's attention. But what do you do when you don't have the budget for a professional photo shoot with models, sets, and accessories? The answer: YourRender.ai and its revolutionary multi-image workflow.
In this comprehensive tutorial, we'll create a professional advertising visual together for a fictional beach volleyball brand "Volley 4 All," starting from scratch and using only artificial intelligence.
The final result: a professional advertising photo created entirely with AI
🎯 What You Will Learn
This tutorial will show you how to:
- Create realistic accessories with Accessory Studio
- Generate immersive backgrounds with Background Studio
- Create virtual models with Character Studio
- Extend images to change their format with Image Tools
- Combine multiple elements in Image Studio Pro
- Add professional text for social media
By the end of this guide, you'll know how to create marketing visuals worthy of a professional agency, without a photographer, without a studio, and without a significant budget.
🏐 Step 1: Create the Accessory with Accessory Studio
Our first step is to create the central element of our advertisement: a professional beach volleyball.
How to Proceed
- Open Accessory Studio from the main menu
- Describe the desired accessory: "professional beach volleyball, yellow and navy blue colors, realistic texture, studio lighting"
- Select the 9:16 format (vertical) for mobile use
- Click Generate
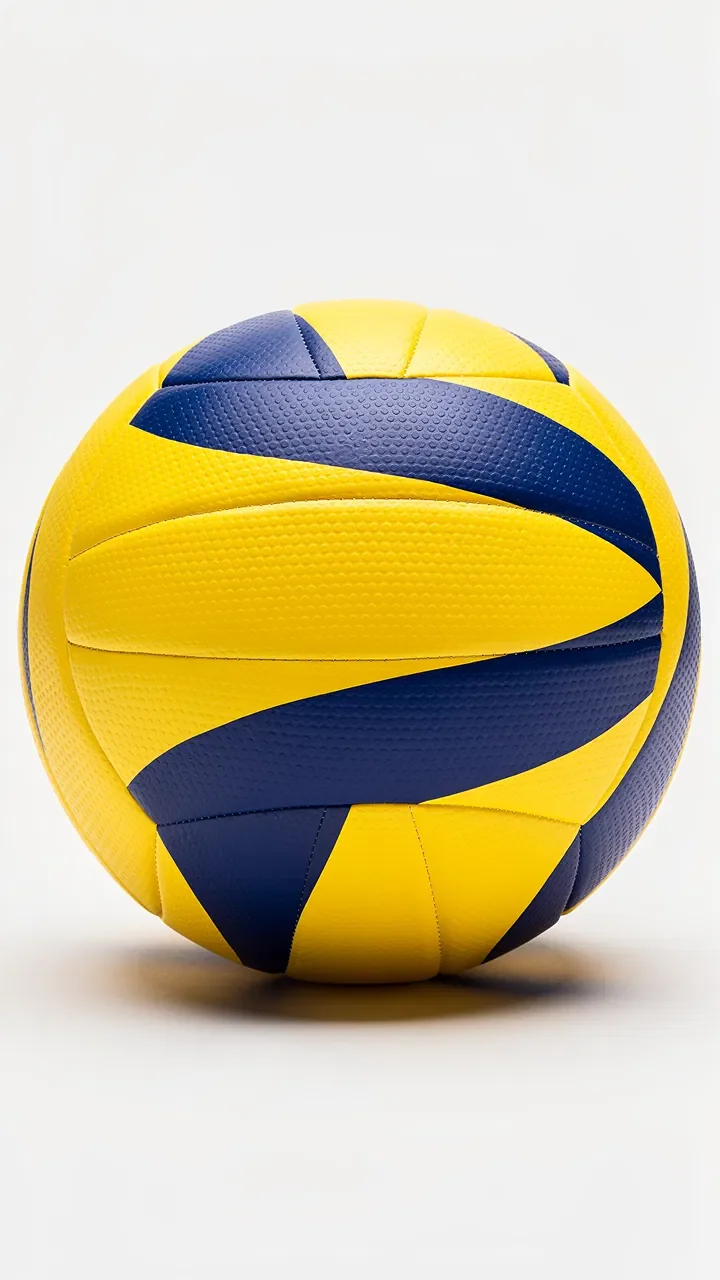
Our beach volleyball generated by AI - note the quality of textures and colors
Tips for Better Results
- Be precise in your description (colors, materials, style)
- Mention the lighting you want (studio, natural, dramatic)
- Specify the background if necessary (white, transparent, colored)
The result is impressive: a photorealistic volleyball with vibrant colors and authentic texture. The AI perfectly captured the characteristic panels and leather appearance of the ball.
🏖️ Step 2: Generate the Background with Background Studio
Now that we have our accessory, let's create the perfect setting: a paradise beach at sunset.
Background Configuration
- Access Background Studio
- Enter your prompt: "tropical paradise beach at sunset, white sand, palm trees, turquoise water, orange and pink sky, lifestyle magazine style"
- Format: 9:16 (vertical, same as the accessory)
- Generate the image
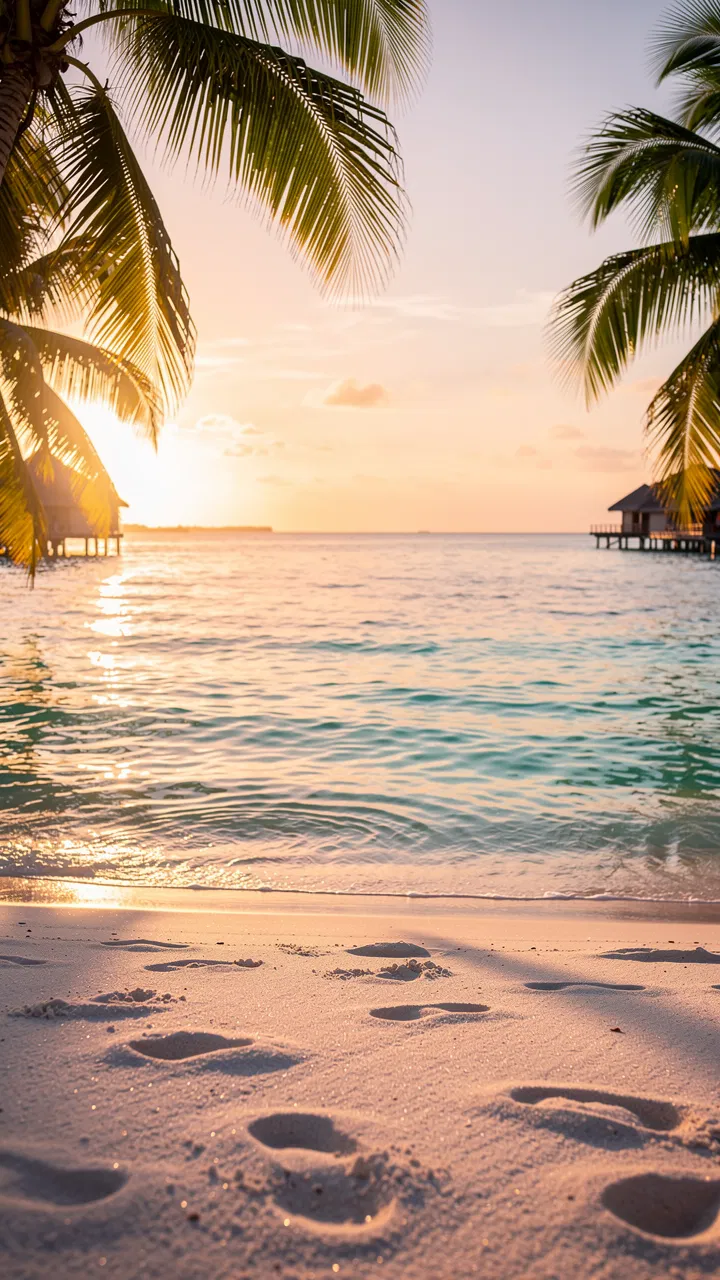
A dream setting generated in seconds
Why This Background Works
- Thematic coherence: beach = beach volleyball, natural association
- Emotional atmosphere: sunset = relaxation moment, lifestyle
- Complementary colors: orange/turquoise contrasts with the yellow/blue of the ball
- Free space: bottom area perfect for placing the model
👗 Step 3: Create the Model with Character Studio
The human element is crucial for emotionally connecting with the audience. Let's create a virtual model in a swimsuit.
Model Generation
- Open Character Studio
- Configure the parameters:
- Gender: Female
- Age: 25-30 years
- Ethnicity: Caucasian
- Outfit: Beige/nude one-piece swimsuit
- Pose: Standing, relaxed, professional
- Format: 1:1 (square) - we'll extend it later
- Generate the model
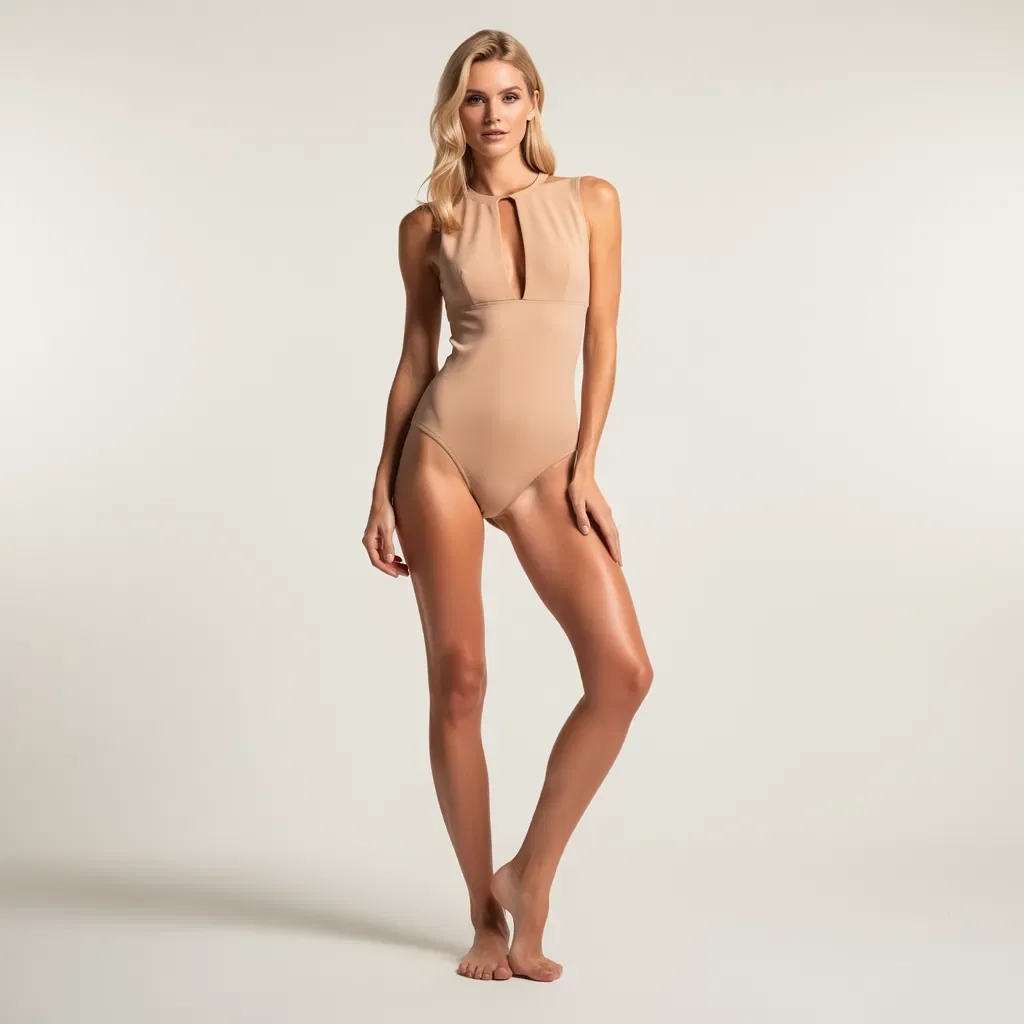
The model generated in square format (1:1)
Important Points
- The square format perfectly captures the entire model
- The pose is natural and professional
- The beige/nude swimsuit is neutral and elegant
- The white background will facilitate integration into the final scene
🔧 Step 4: Extend the Image with Image Tools
Our model is in square format, but we need a 9:16 vertical format to integrate it into our composition. This is where Image Tools comes in.
Using Image Tools for Extension
- Go to Image Tools > Extend Image
- Upload the model image (square format)
- Select the new format: 9:16
- The AI will intelligently extend the image top and bottom
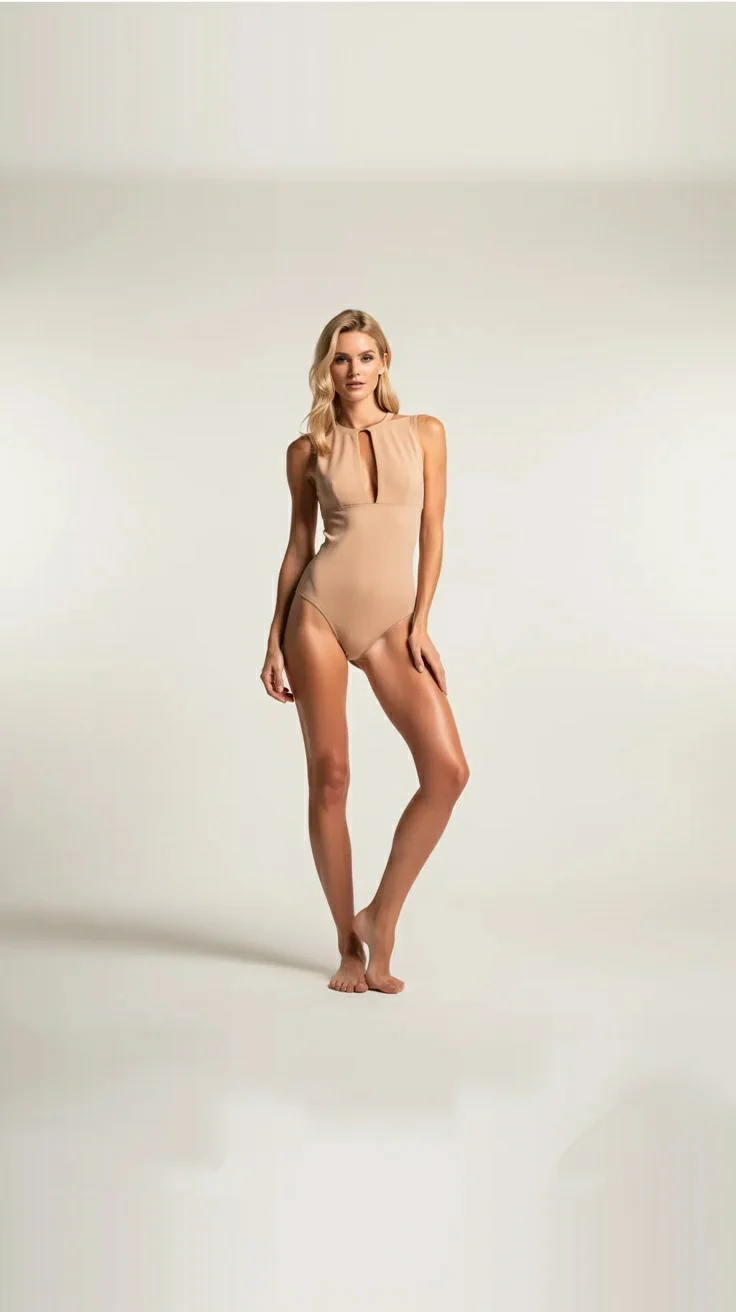
The same model, now in vertical 9:16 format
What the AI Does
Image extension uses outpainting - an AI technique that:
- Analyzes the existing context (background color, lighting, style)
- Generates coherent content for the added areas
- Perfectly preserves the original subject
- Creates an imperceptible transition
Notice how the white background naturally extends up and down while maintaining the model's integrity.
🎨 Step 5: Assemble Everything with Image Studio Pro
This is the magic moment! We'll combine all our elements in Image Studio Pro with the Multi-Product Arrangement feature.
Composition Setup
- Open Image Studio Pro
- Select Multi-Product Arrangement mode
- Upload your images:
- Main image: Model (9:16)
- Background: Tropical beach (9:16)
- Accessory: Volleyball (9:16)
- Describe the desired arrangement: "Place the model on the beach, holding the volleyball in her hands, lighting consistent with the sunset"
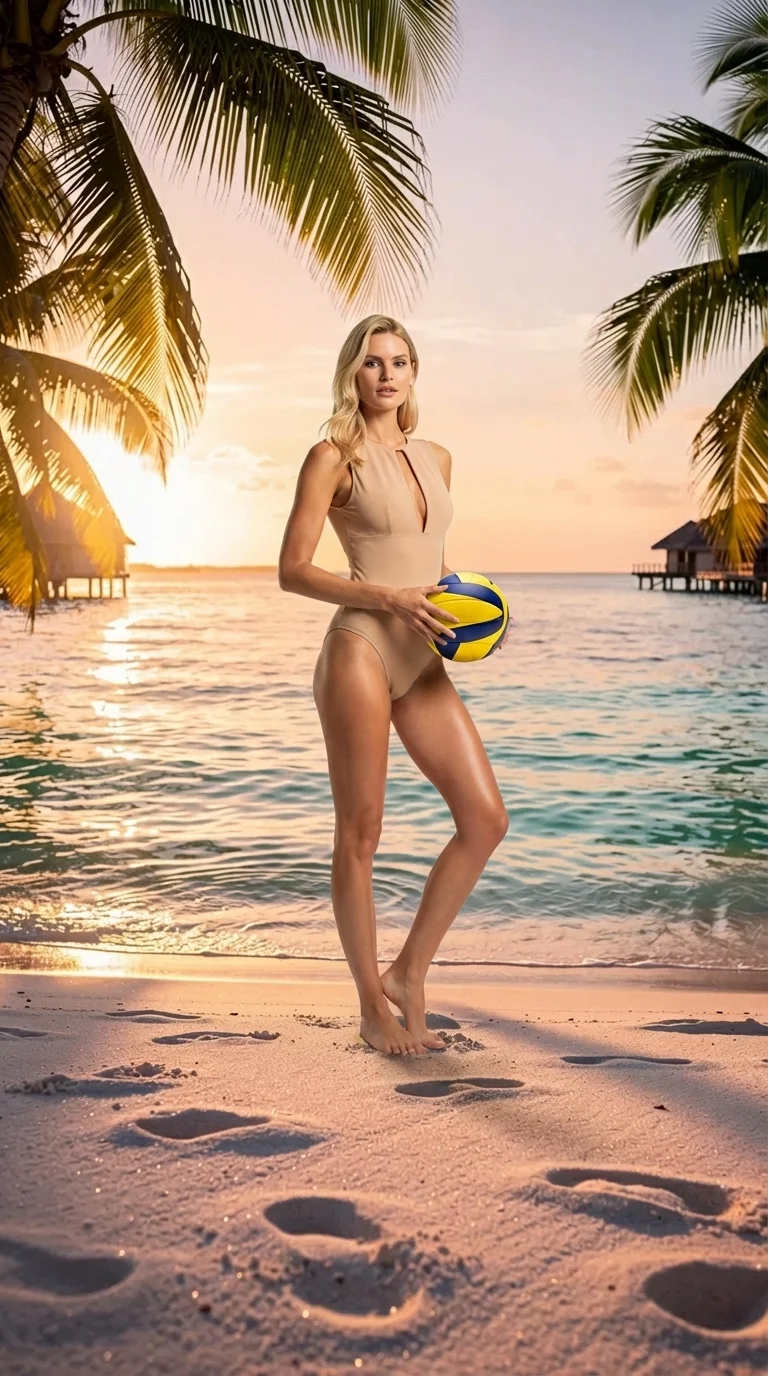
The result of Multi-Product Arrangement: a coherent and professional scene
The Power of Multi-Product Arrangement
This feature is revolutionary because it:
- Unifies lighting: adapts shadows and lights of each element
- Harmonizes colors: adjusts color temperature for overall coherence
- Manages perspective: adjusts sizes and angles for a natural rendering
- Integrates elements: merges edges imperceptibly
The result is stunning: it looks like a real professional photo shoot!
✍️ Step 6: Add Text for Social Media
To finalize our advertising visual, let's add a catchy text with the Text & Typography feature.
Adding Marketing Text
- In Image Studio Pro, activate Text & Typography
- Enter your slogan: "Live your best life with Volley 4 All"
- Configure the style:
- Font: Modern, readable
- Color: Dark blue (consistent with the ball)
- Position: Top of the image
- Background: Semi-transparent light banner
- Generate the final visual
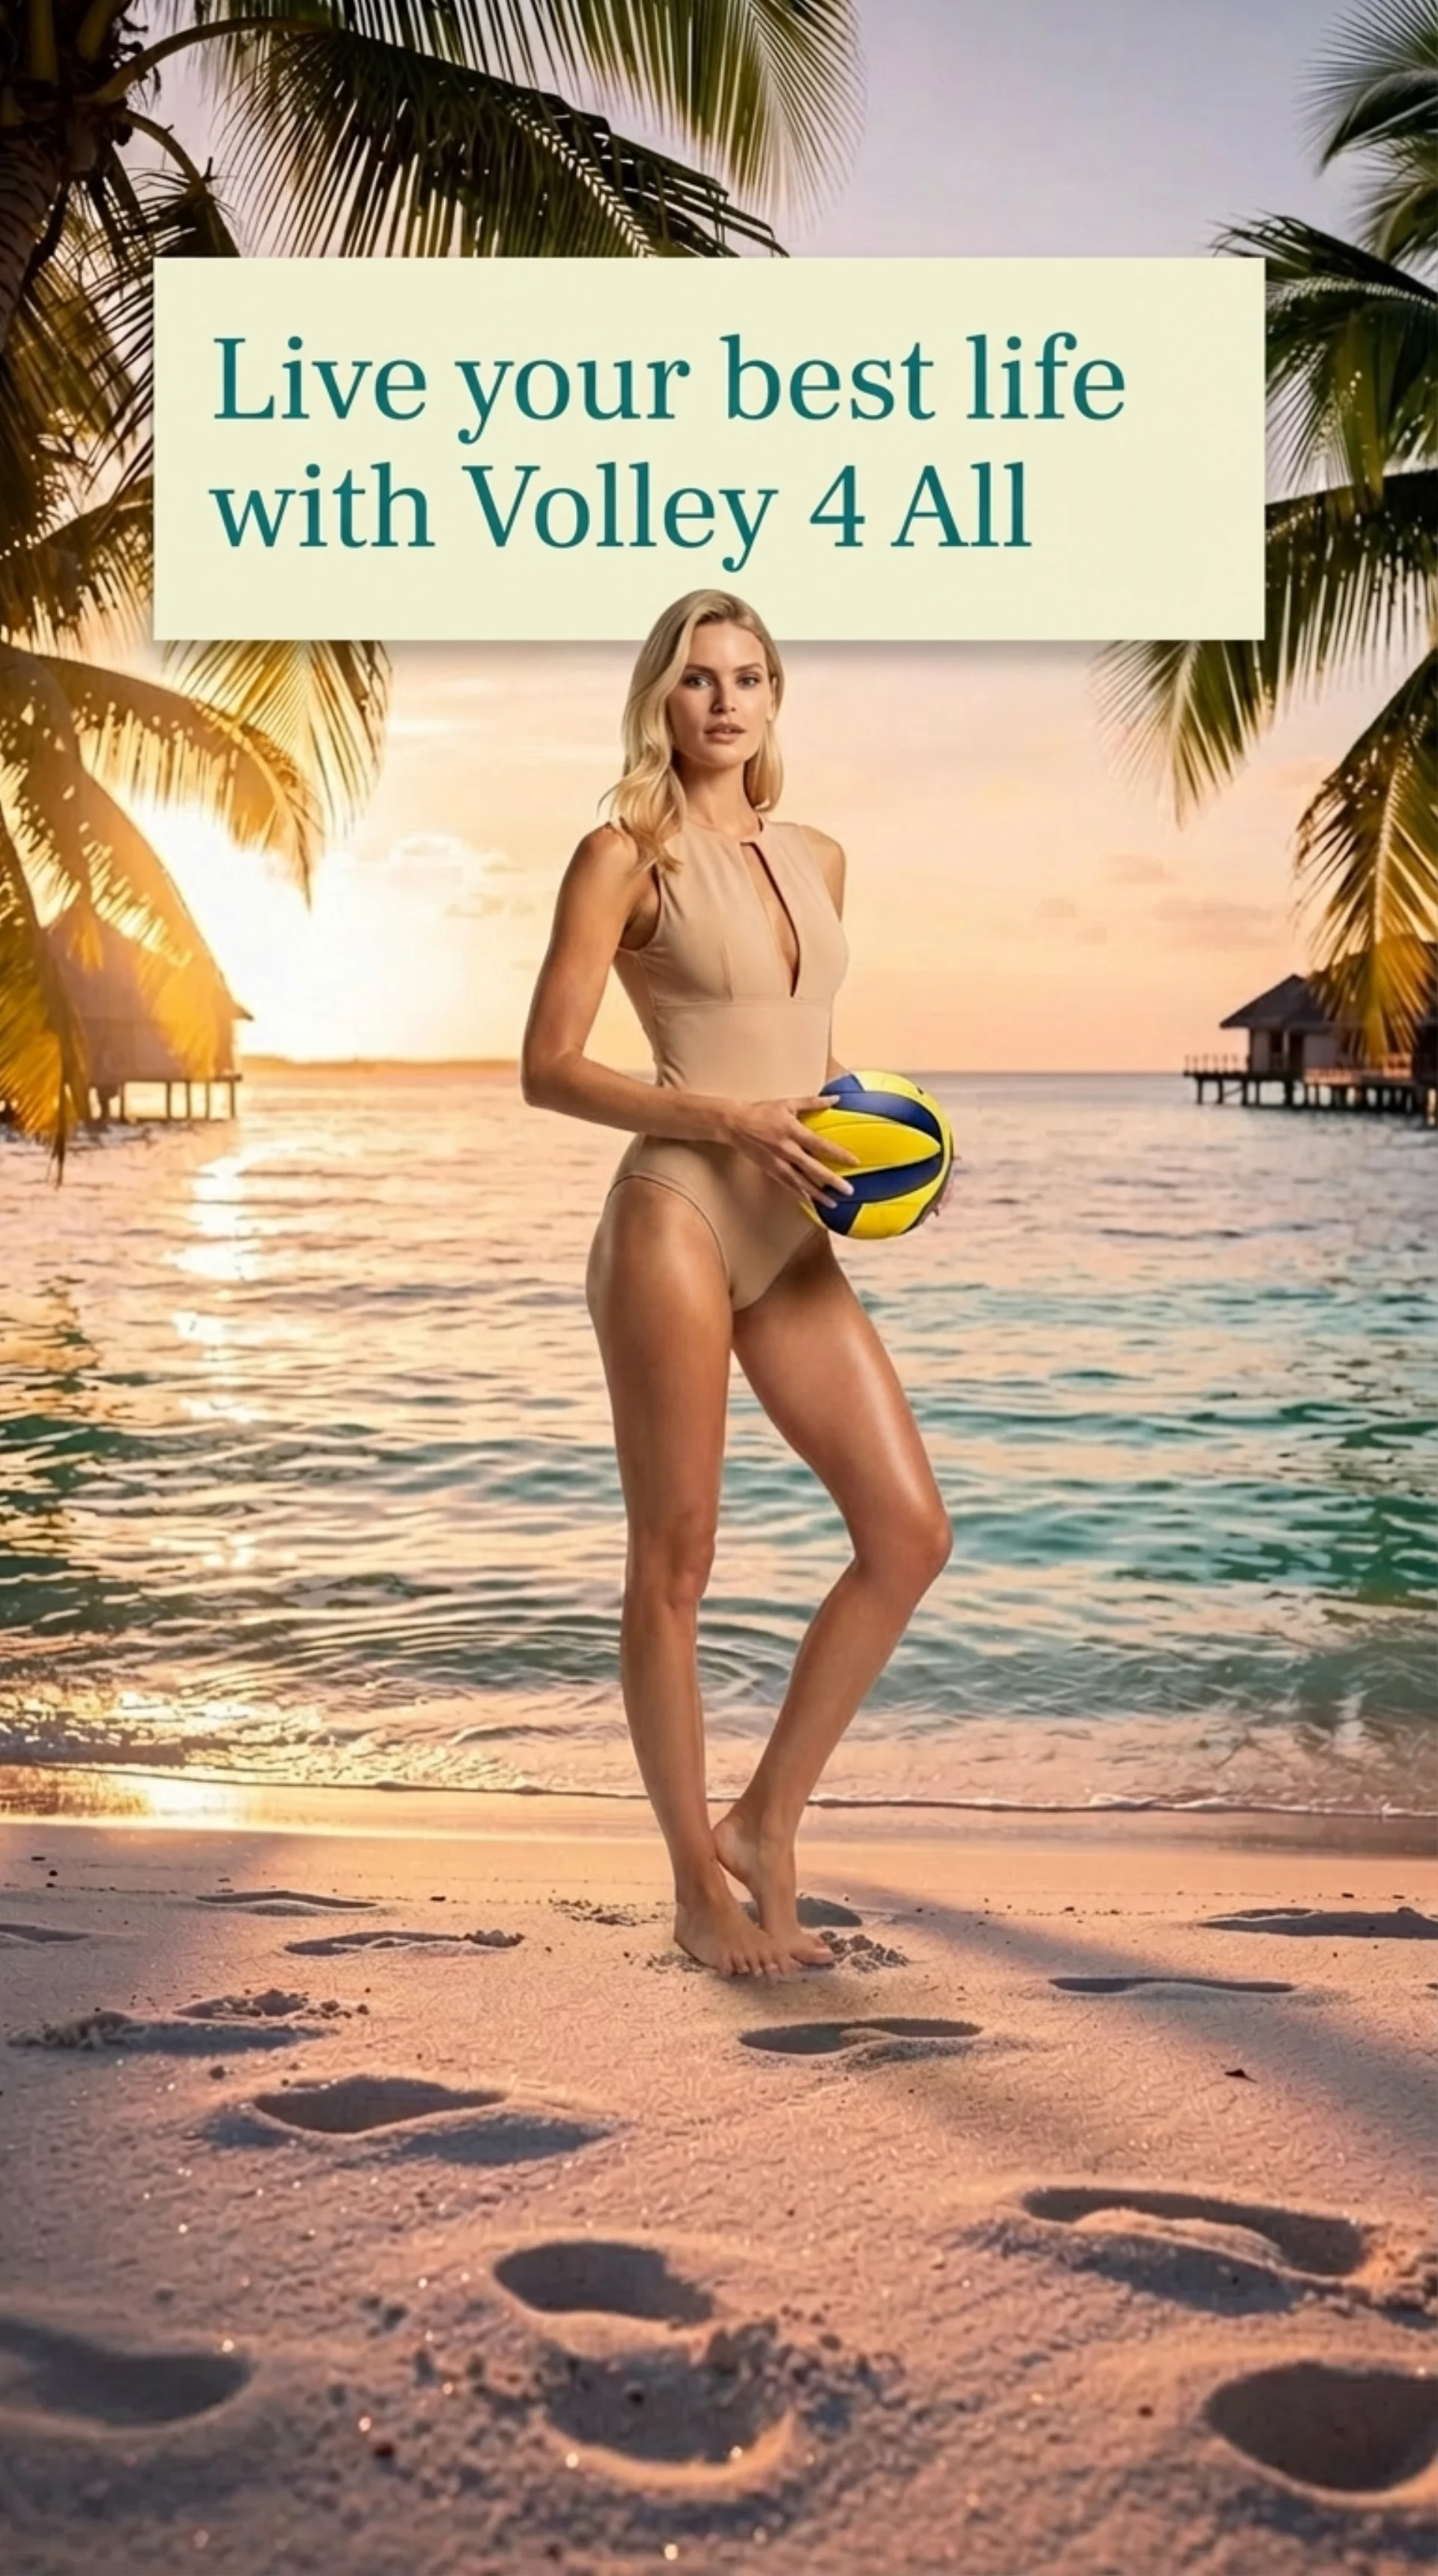
The final visual ready for Facebook, Instagram, or any other social network
Best Practices for Text on Image
| Element | Recommendation |
|---|---|
| Length | Maximum 6-8 words for maximum impact |
| Contrast | Dark text on light background or vice versa |
| Position | Avoid covering the main subject |
| Readability | Simple font, sufficient size |
| Call-to-action | Include the brand name |
📊 Workflow Summary
Here's the complete workflow we followed:
| Step | Tool | Input | Output |
|---|---|---|---|
| 1 | Accessory Studio | Text prompt | Volleyball |
| 2 | Background Studio | Text prompt | Tropical beach |
| 3 | Character Studio | Parameters | Model 1:1 |
| 4 | Image Tools | Image 1:1 | Model 9:16 |
| 5 | Image Studio Pro | 3 images | Composite montage |
| 6 | Text & Typography | Text + image | Final visual |
Total estimated time: 10-15 minutes
Compared to a traditional photo shoot that would require:
- Beach or studio rental
- Professional model
- Photographer
- Accessories
- Post-production
The cost and time are divided by at least 10!
💡 Use Cases
This multi-image workflow is perfect for:
E-commerce and Retail
- Products in context photos
- Virtual lookbooks
- Seasonal campaigns
Social Media
- Instagram and Facebook posts
- Vertical stories
- Sponsored ads
Digital Marketing
- Web banners
- Landing pages
- Newsletters
Agencies and Freelancers
- Client mockups
- Campaign prototypes
- Concept tests
❓ FAQ
How Much Does This Complete Workflow Cost?
Each image generation costs 9 credits. For this complete tutorial (6 generations), count about 54 credits. With the free trial of 150 credits, you can create several complete visuals.
Can I Use My Own Photos as a Base?
Yes! You can upload your own products, models, or backgrounds and combine them with AI-generated elements.
Are the Generated Images Royalty-Free?
Yes, all images created with YourRender.ai belong to you and can be used commercially without restriction.
What Export Formats Are Available?
You can export in PNG, JPEG, or WebP, in standard or 4K resolution depending on your subscription.
Can I Modify the Result After Generation?
Absolutely! You can use the editing tool to adjust colors, retouch details, or regenerate specific parts of the image.
🚀 Take Action
You now have all the keys to create professional marketing visuals with YourRender.ai's multi-image workflow.
Start your free trial with 150 credits and create your first multi-image composition today. Whether for your e-commerce, social media, or advertising campaigns, AI is now your best creative ally.